
Mounting a Network Drive:
*Note: Off-campus computers connect and access files through JMU’s SSL VPN service.
Configuration Instructions
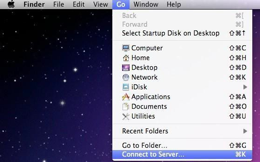
- Click on your Finder icon in the dock.
- In the upper left hand corner, you should now see Finder next to the apple icon. Select Go from that menu bar.

- Choose Connect to Server from the list
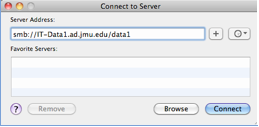
- Another box will appear. In the Server Address field, type:
smb://IT-Data1.ad.jmu.edu/data1
or
smb://IT-Data2.ad.jmu.edu/data2
The number after each “data” will correspond to the drive you are mounting. Click Connect.
See Notes below for more details and drive mounting options.
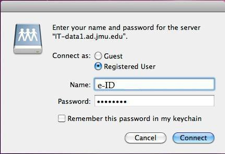
- You will now be prompted for your eID and password. Click Connect.
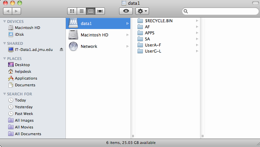
- Your drive will now appear. You will be able to see your department listing, as well as the user folders that are contained on this drive.
Notes:
Only half of the user folders are contained on each of the IT-Data drives, so only user folders A-F and G-L will appear on IT-Data1, while M-R and S-Z are located on IT- Data2. Depending on where your name falls in the alphabet it may be necessary to mount both IT-Data1 and IT-Data2.
Alternatively, you can map to: smb://ad.jmu.edu/it-file
If you are unable to establish a connection to the server, open up a web browser to make sure that the computer is registered on the network and that you have an internet connection. In some cases, it may be necessary to type “cifs” or “afp” instead of “smb” in the server address field in order to connect.