
Your website only displays documents that have been published. After creating or editing a document, you will not see any changes on the live website (www.jmu.edu) until you republish it. Follow these instructions to publish edits made to your website.
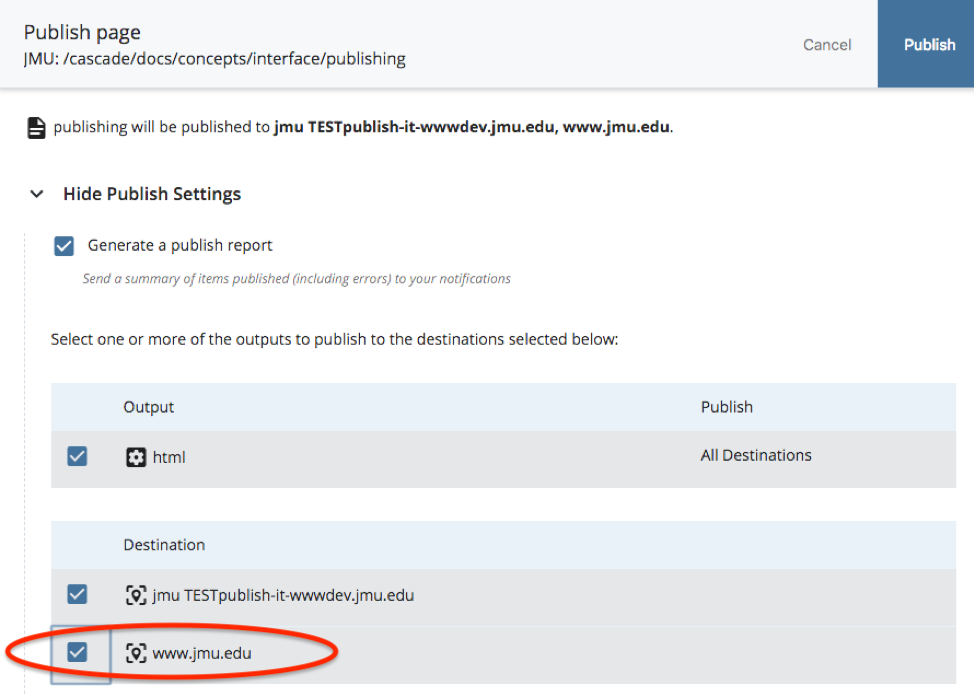
- Once you have submitted all changes, select "Publish" in the top toolbar
- Check the box next to www.jmu.edu. This box should be checked by default and will publish to the live web server
- Click "Publish"
Note: Please do not publish your entire website folder. The publishing queue can only handle a limited amount of activity, and publishing your entire website will delay others from publishing their pages. Please publish only the pages that you have changed.
See Troubleshooting: Publishing Error for error message help.
If you are making changes to your content and want to share the changes internally with your team, we suggest you only publish to the test website. This will allow anyone on a JMU network to view your test website by adding "dev" to the URL after the www.
For example, this a live webpage URL: www.jmu.edu/cascade/index.shtml
To view the test page, the URL would be: wwwdev.jmu.edu/cascade/index.shtml
The test pages are only visible on a JMU network connection. When you are ready to publish your page to the public (on www.jmu.edu), we recommend you always publish to both the test server and the "www" server. This ensures that your "wwwdev" page is identical to your "www" page.

