
Now that you have learned how to create multi-blocks, as well as the many types of content you can create in a multi-block's grid cell, you will now learn about other types of blocks that you can add to a page. In this page's tutorial, we will review what a slideshow block is and how to create it.
The example below shows a slideshow with title text, overlay text and a read more link. Arrows to advance the slideshow appear when there are multiple slides.

The example below is a slideshow with just images. Without text or a read link, a basic slideshow shows just images and the arrows to advance the slide.

Step 1: Create the slideshow
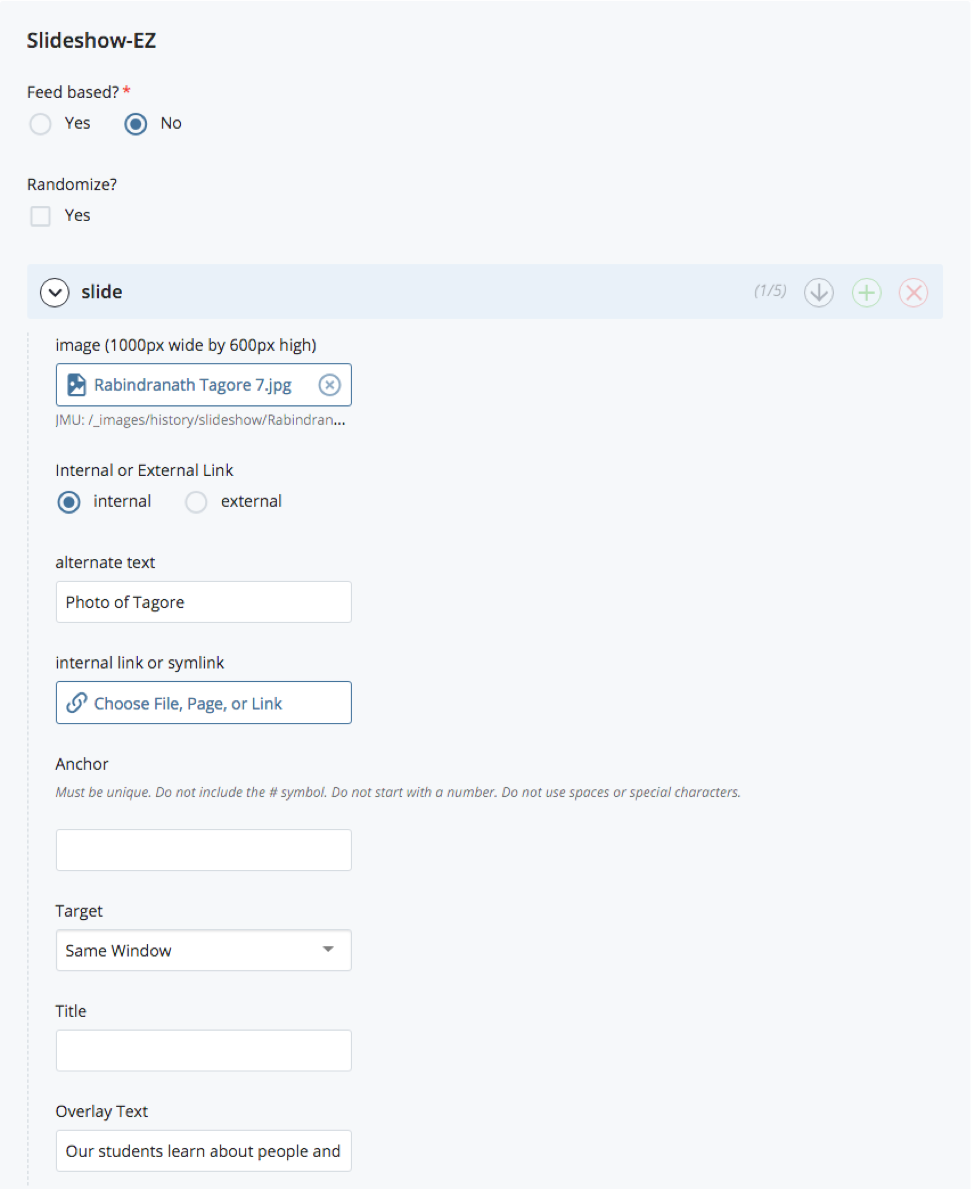
- Add Content > _Responsive > Slide Show - EZ
- Name the slideshow after the page it will be wired to
- For example, a slideshow on an "About" page should be named about-slideshow-ez.
- Choose a "_blocks" folder to place the file in
- Select the appropriate "Slideshow-EZ options
- Feed-based?:
- Check "No" if you want to continue manually setting up the slideshow
- Check "Yes" if you want the slideshow to automatically generate from an Article Feed
- Note: If you select "Yes", you will have to contact itweb@jmu.edu to get your configuration set up
- Randomize?:
- Select "Yes" to allow the slideshow to randomly choose a different image each time a user views your page
- Feed-based?:
Step 2: Add images and links
- Add images to the slideshow that meet the slideshow image size requirements
| width | height | |
|---|---|---|
| Slideshow Image | 1000 | 500 |
- Upload the images you want to appear on the slideshow
- (Optional): add text that will display overtop the image
- If you are uploading your own images, be sure to format them with the following dimensions:
- Resolution must be 72dpi
- Recommended file format is .jpg with quality of 8
- (Optional) Add links to slides
- If one slide has a link, the rest should have links, too. Either link all images or don’t link any at all.
- Use the overlay text box to enter text that will display over the image next to the slide navigation arrow
- Just like links, if one slide has overlay text, the rest should have overlay text, too. However, we recommend using slideshows to display images that speak for themselves, with links to pages that go into more detail.
- Select full-width or half-width for the slideshow
- Note: Overlay text will not display on half-width slideshows
Step 3: Wire slideshow to page
- Wire the slideshow block, to the "FEATURE_IMAGE" Region's block, wire the shared format: "slideshow-ez" to the Format.
- On a page that has a slideshow, click "Edit" in the top toolbar and select the "Configure" tab
- Locate "FEATURE_IMAGE" Region
- Check the "No Block" and "No Format" boxes to revert the Region to its default setting
- Click "Save and Submit" in the vertical ellipsis
- Click "Edit" in the page's top toolbar again
- Uncheck the "No Block" and "No Format" boxes in the "FEATURE_IMAGE" Region
- Select "Save and Submit" in the vertical ellipsis
- Edit the page to add a feature image


Digital Marketing