Jump to section
Now that you have learned the concepts and content creation methods of a page, you will now learn about other types of documents, such as Articles. In this page's tutorial, you will learn what an Article is and how to create one. Also, here is a helpful reference for creating effective long-form content.
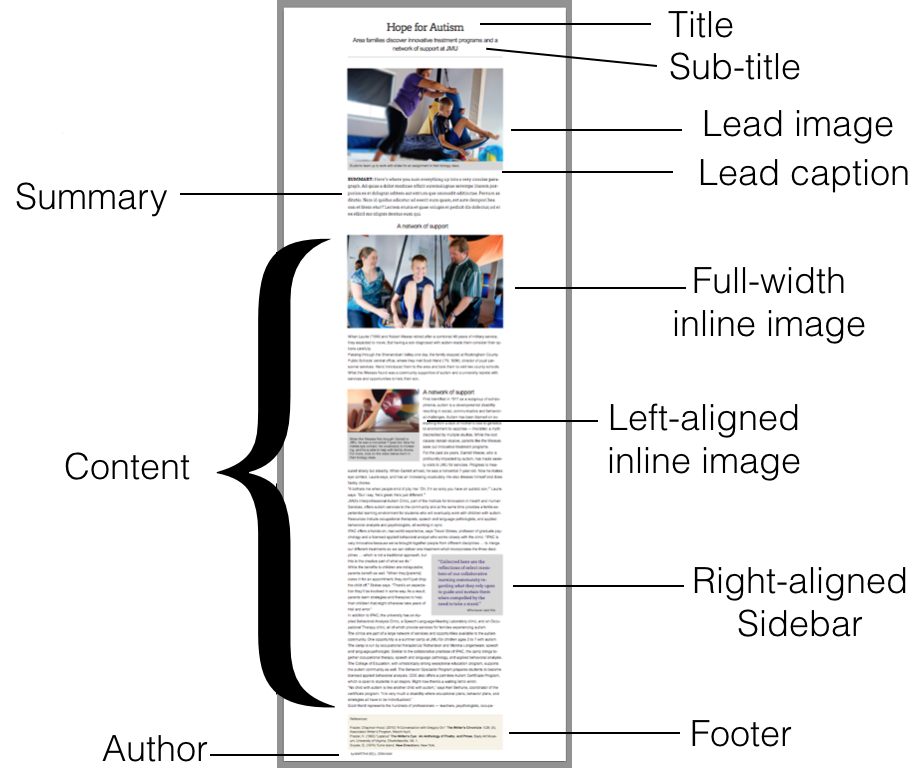
An Article is a type of document that displays a story or news piece. This is what an Article looks like on a website:
Step 1: add an Article to your website
- In the top-left corner of Cascade, select: Add Content > [your website] > Article
- Note: Some Cascade accounts will have a "News" option in place of "Article." If you do not see "Article" in your website's folder within the "Add Content" menu, select "News" (both will create an Article). If you do not see either of those options, or if you do not see your folder in the "Add Content" menu, contact itweb@jmu.edu and they will set you up with that menu option.
Step 2: Name the Article
To name an Article, add the month and day of publishing to the beginning of Article file names. For example, a news item titled "Professor Receives Grant" scheduled for publishing on March 8, 2019 should be named:
03-08-professor-receives-grant
Step 3: Select a placement folder
Place all Articles in the JMU site's "News" folder. Within the News folder should be a folder for your website, and within your website folder should be folders by year and sometimes by month. You should place your Articles in the folders corresponding to the year and/or month for its publication date. To navigate to your website's News placement folder, click on the Placement Folder field and select: Browse > JMU > News > [your website] > [year]. Follow along with the example below:
If your website's News folder does not have a folder for the current year, please ask itweb@jmu.edu to provide you with one.
Step 4: Start filling out some basic fields
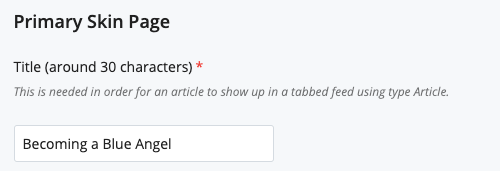
- Enter the Article title in both Title fields (less than 30 characters)
- Enter a publish date and/or time
- Note: If you want to write articles before its publish date, uncheck "include when indexing" under the Configure tab so that the article will not appear in any feed until it is published; if you do not uncheck this box before the article is published, it will appear in your feed if tagged and will lead users to a broken link. Be sure to recheck the box when the article is published.
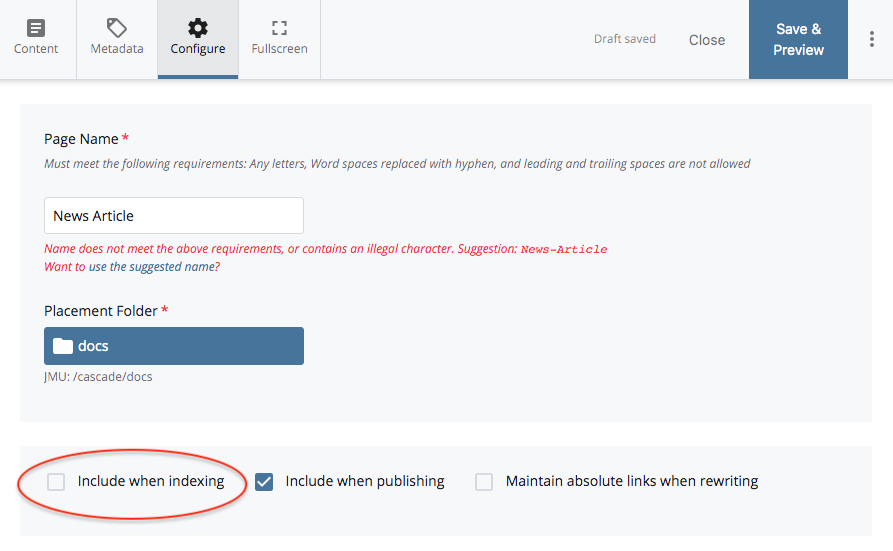
- Note: If you want to write articles before its publish date, uncheck "include when indexing" under the Configure tab so that the article will not appear in any feed until it is published; if you do not uncheck this box before the article is published, it will appear in your feed if tagged and will lead users to a broken link. Be sure to recheck the box when the article is published.
- Add an optional subtitle
- Enter a 1-2 sentence summary of the Article in the "Summary" field
- Enter your full name in the "Author Full Name" field
Once these fields are filled out, continue.
When you create Articles, you will also create Feeds for Articles to appear in. For Feeds to know which Articles to display, you must assign tags to your Articles. For example, an Article with a "JMU Home" tag will appear on the JMU homepage and the JMU News homepage. An "education" tag will make the Article appear on the Education topic page, just as a "business" tag would make it appear on the Business topic page.
To add a tag to an Article:
- In the Article's top toolbar, select: Edit > Content tab
- Scroll down to "Tags" within the "Primary Skin Page" section
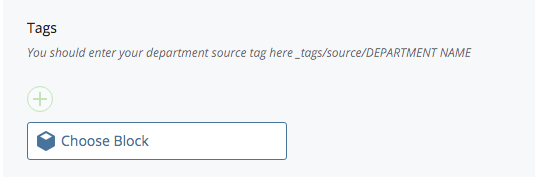
Tagging Articles with your department tag
In the tags section, you should see that your department tag is already added. If you do not see your department tag, contact itweb@jmu.edu.
Tagging Articles with another department's tag
If you wish to add a second tag that is not your own, see instructions for another department's tag.
Note: "Related Articles" feeds will only show related Articles with the same first tag as the current Article. For example, if an Article has the first tag "_tags/_topics/business" and a second tag "_tags/source/college_of_business," the Related Articles" section will ONLY have articles tagged "_tags/_topics/business."
You can use pull-quotes within your articles to draw attention to a quote. To create a pull-quote:
- Navigate to your Article and select Edit > Content tab in the top toolbar
- Scroll to the location you want the pull-quote and type "PUT PULL-QUOTE HERE"
- Click on the "<>" icon in your WYSIWYG toolbar and scroll to the location you want the pull-quote to reside.
- Copy and paste this code into the HTML, replacing your "PUT PULL-QUOTE HERE". Then edit the text in bold with your quote and person's name.
- Note: "sidebar-right" could also be "sidebar-left" if you want the pullquote to be left-aligned.
<aside aria-label="quote" class="sidebar-right" role="complementary">
<blockquote>
<p class="pullquote">"HERE IS THE QUOTE"</p>
<p class="pullquote-attribution">PERSON'S NAME</p>
</blockquote>
</aside>
- Note: "sidebar-right" could also be "sidebar-left" if you want the pullquote to be left-aligned.
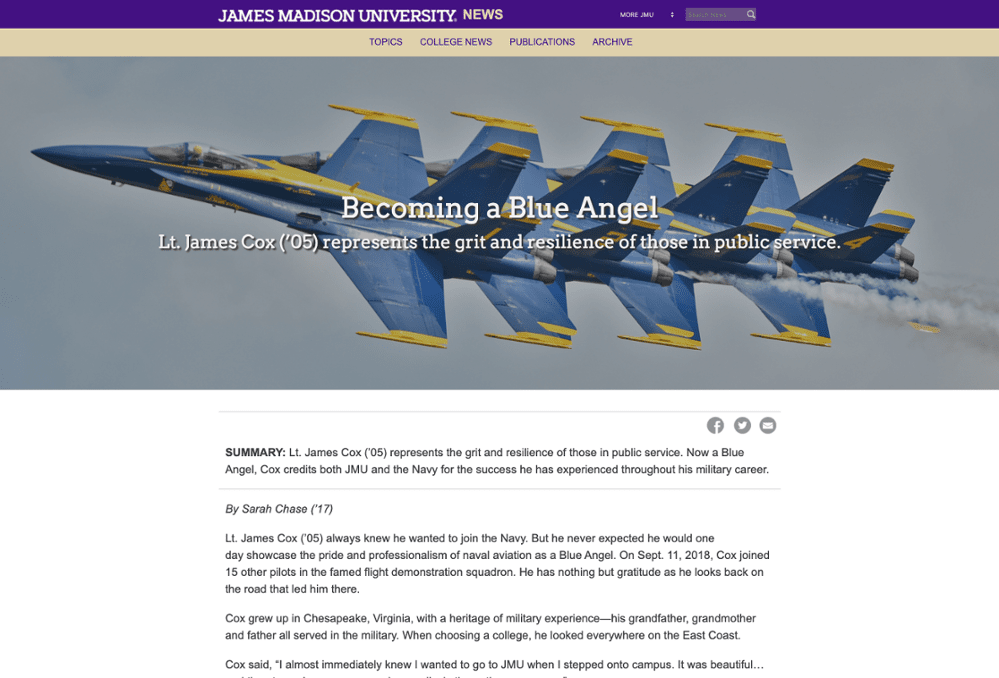
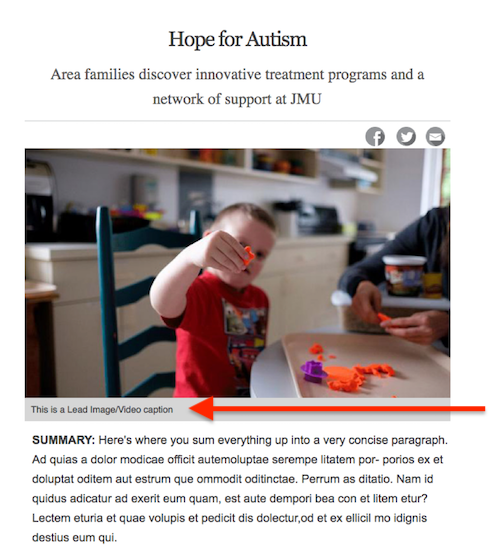
There is an option to add a full width image at the top of your article. This expands beyond the margins of the article and provides a dramatic introduction. The title and sub-title float above it.
Here is an example of an article with a "Full Width Lead Image"
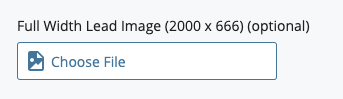
Full Width Lead Images can be added via this field:
WARNINGS:
- If you specify a Full Width Lead Image, it will not show your Lead Image, however you will still want to create a Lead Image for your article since it will automatically create the thumbnail. AGAIN: The Full With Lead Image will not be used as your thumbnail, so you will still want to create a Lead Image, which automatically creates your thumbnail.
- You will want to be careful about the length of your title when providing a full width image because it may get too big at some resolutions. If you MUST have a longer title to appear in feeds, however you want a smaller title on top of your Full Width Lead Image, then specify the smaller title in the "Primary Skin Page Title" field. This will ONLY affect what shows up on top of the Full Width Lead Image, and will not affect what shows up in feeds.
Most article images will require text-wrapping. See Adding Images for details about right-/left-aligned images, captions, and wrapping images with text.
If you wish to embed a single tweet or Facebook post as an image in your Article, use this Embed Social Media Posts Guide.
| ARTICLE | width | height |
|---|---|---|
| full-width | 2000 | 666 |
| lead | 1000 | 600 |
| right-aligned OR left-aligned | 310 | varied |
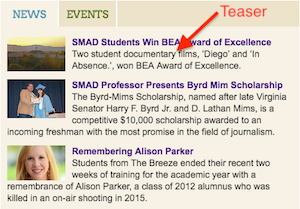
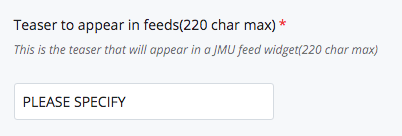
The teaser is the brief summary that will show with the Article when it appears in a Feed:
To add a teaser, select:
- "Edit" in the top toolbar of the Article
- Scroll down to the "Teaser" text box and type your summary.
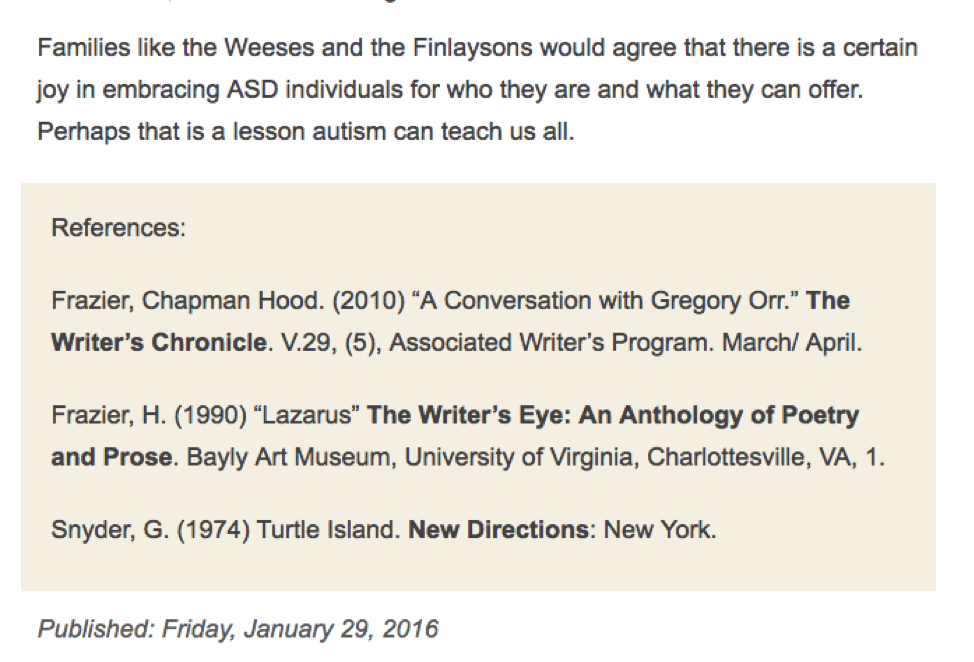
The footnote is the space at the bottom of the Article where you place references, an additional statement about the author, and/or additional notes you want to include.
To add a footnote, select:
- "Edit" in the top toolbar of the article
- Scroll down to "Footnote" and add the appropriate text.
Lead images are displayed at the top of the Article and are used to represent the Article in Feeds and on Facebook. To create a lead image for your Article, Feeds, and Facebook, follow these steps:
Step 1: Add Article Image to _images folder
-
Select: Add Content > _Responsive > Article Image
-
Place the Article Image in your appropriate images folder (select: Browse > JMU > _images > [your website])
Step 2: Add image to thumbnail field
1. Creating an "Article Image" as specified above will automatically create a thumbnail image (172x103) beside your 1000x600 lead image within the folder you placed the Article Image. Choose the automatically created thumbnail image here:
If you do not supply a thumbnail image, Cascade will substitute a random JMU thumbnail like this. 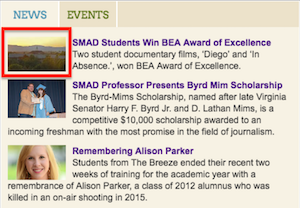
Step 3: Add lead image/video to Article and Facebook
- On the Article, select: Edit > Content tab
- Scroll down to the "Add lead image" field and select:
- Browse > JMU > _images > [your website] > [the image you saved from step 1]
- In the Lead Image/Video Caption field, add an appropriate caption
- Note: This caption will appear under the Lead Image on the Article as well as on Facebook
- Also Note: Putting photo credits here are not necessary or recommended if the photo is already owned by JMU. It is an unnecessary distraction from the content of the article. Photo credits may be put in the footer if you would still like to include them. If the image is NOT owned by JMU and used by permission then a photo credit is necessary.
- In the social media image field, browse for the image the same way you did in the instruction above, however Facebook will use the lead image if you do not specify a social media image here. If for some reason you want the social media image to be different from the lead image, you can specify a social media image.
If you want to have a lead video at the top of your Article in place of a lead image, copy and paste the video's URL into the "Lead Video URL" field.
- Copy the video's URL (for example: https://www.youtube.com/watch?v=EjOaemmheU8) from Youtube or Vimeo
- Click "Edit" in the top toolbar of the Article, and then select the Content tab
- Scroll down until you see the "Lead Video URL" field
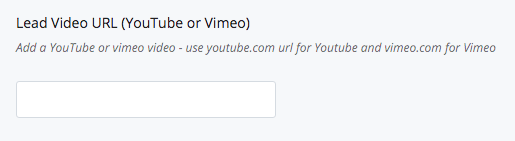
- Paste the URL in the field
We still encourage you to upload a lead image and thumbnail image in addition to pasting the video so that a more related image will appear in a feed and Facebook posts rather than a generic image. This will not affect what appears at the top of the Article; the video's URL will override any lead image uploaded.
If a video is internally produced and you want to make sure it gets seen, it is strongly encouraged to create an article and specify the video (preferably YouTube) as the lead video instead of linking directly to the video on YouTube. Here are the advantages of creating an article for the video and specifying the video url in the "Lead Video URL" field:
- If we link straight to the video site (like YouTube) they will be in YouTube's ecosystem, and will start watching cat videos, rather than staying in the JMU ecosystem.
- Articles can get more exposure through Cascade feeds.
- Articles with a lead video will automatically have a "play button" over the thumbnail, which generates many more clicks than articles without a play button.
- Articles have analytics that can be made readily available through the Cascade interface, or through report dashboards that can be requested. This can be easier than going into the YouTube account to find analytics for a video.
- The Article format can provide additional CTAs and context, whereas the YouTube page does not have as straightforward a way to provide this.
- Having the video as a "Lead Video" instead of embedding it further down the article has these benefits:
- It allows for the video to be viewed as a pop up, rather than inline. This is a better viewing experience in both mobile and desktop. It's also easier to specify the video url than to embed a video with HTML markup.
- The thumbnail "play button" mentioned above generates more clicks.
- Readers generally will engage with and remember video content more than text content, however via progressive engagement, they can continue reading to get more context.
When an Article's information has been edited, a link to the Article's update will appear at the top of the Article for readers to click on:

When readers click the "Read update" link, the link's anchor will take the reader to the bottom of the Article where the new information is displayed beneath a horizontal line:
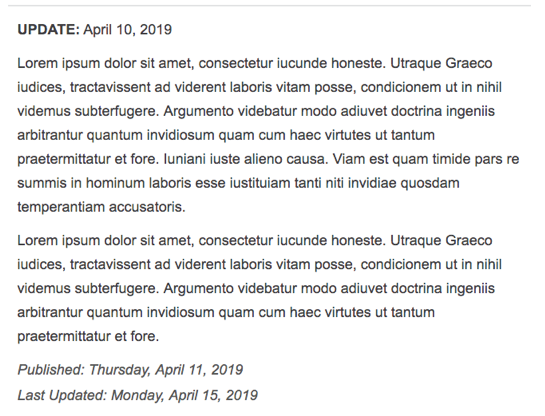
Once you have updated the Article's content, follow these steps to add a "Read Update" and link to the update at the bottom:
Step 1: Add "Read Update" link
- On the Article, select: Edit > Content tab
- In the WYSIWYG content field, add: "Updated [Month] [Day], [Year] - Read update" on a new line at the top, above the existing article content
- Note: Be sure to adjust the date accordingly and apply boldface like the example above
Step 2: Add an anchor to "Read Update"
Next, you will need to add an anchor to "Read Update" so that when readers click on the link, it will take them to the bottom of the Article where the update is below the horizontal line. Follow these steps to add an anchor:
- In the WYSIWYG content field, highlight "Read Update"
- Select the anchor icon in the content field's toolbar (looks like a ribbon)
- Add an anchor I.D. that is relevant to the content to where you are anchoring (in this case, you could type "update")
- Scroll down to the updated information in the article and highlight the first word within the update
- Select the anchor icon and make the anchor I.D. the same as the I.D. you assigned to "Read Update"
- If you chose "update" as the "Read Update" anchor I.D., then the anchor for the first word in the update should also be "update"
Articles can have grid cell content below the main "Content". If you know how to create grid cells on pages, then these will behave the exact same way. Anything you can do in a page, you can now do in an article.
The grid cell content will appear below the main Content, and above the dates of publishing and modification as in this example:
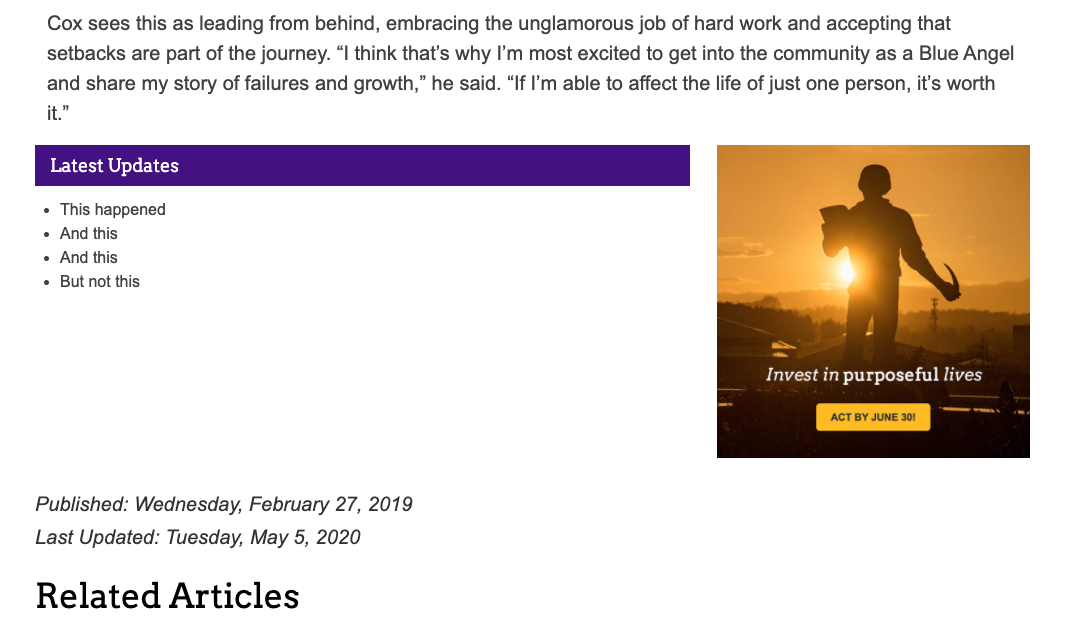
In this example, there are two WYSIWYG cells, one with a bullet list, and another with a simple square spot. But don't let that limit you. You can have any type of content in these cells, just like pages.
Simply follow the same directions for creating grid cells, and then for wiring them to your article.
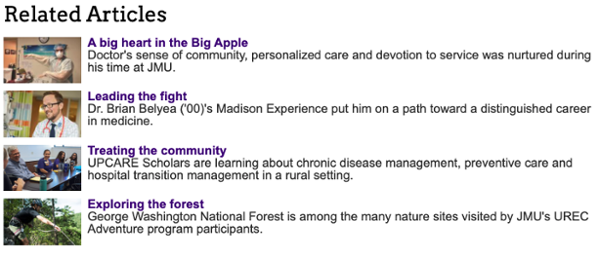
The Related Articles that appear at the bottom of a published article are generated from the first tag of the article. For example, if the first or topmost tag of the article is "college-of-business" then the Related Articles section will display articles tagged with the same "college-of-business" tag. If the Related Articles that appear are not relevant to your article, you may need to adjust the order of your article tags.
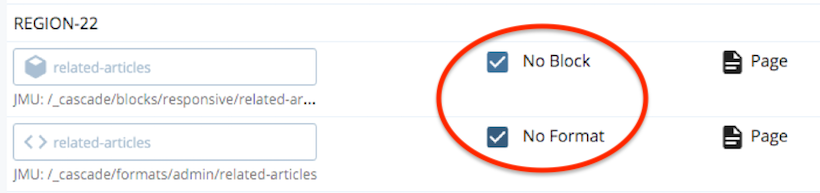
Hiding "related articles"
Check both "No Block" fields to remove the block and format in Region 22
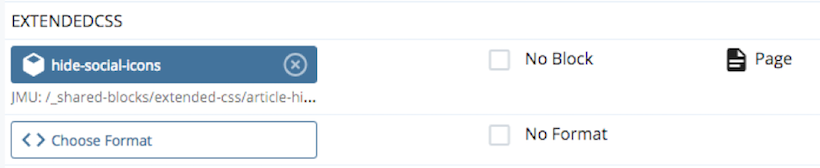
Hiding the social media icons
Set the block in "EXTENDEDCSS" Region to the "article-hide-social-icons" shared block