
This guide walks you through the process of uploading a caption file to your YouTube video.
Uploading a caption file is useful for media you have sent to a captioning vendor. Make sure you have downloaded the file from the vendor in one of the following formats: srt, sbv, sub, or vtt.
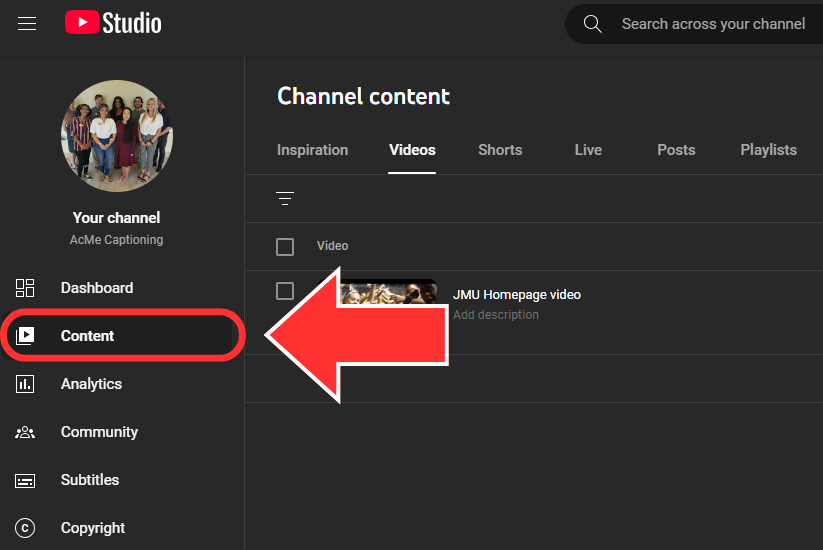
- From the "Content" page in your YouTube Studio, click on the video you would like to caption.
- If you are having trouble finding the YouTube Studio, go to studio.youtube.com.
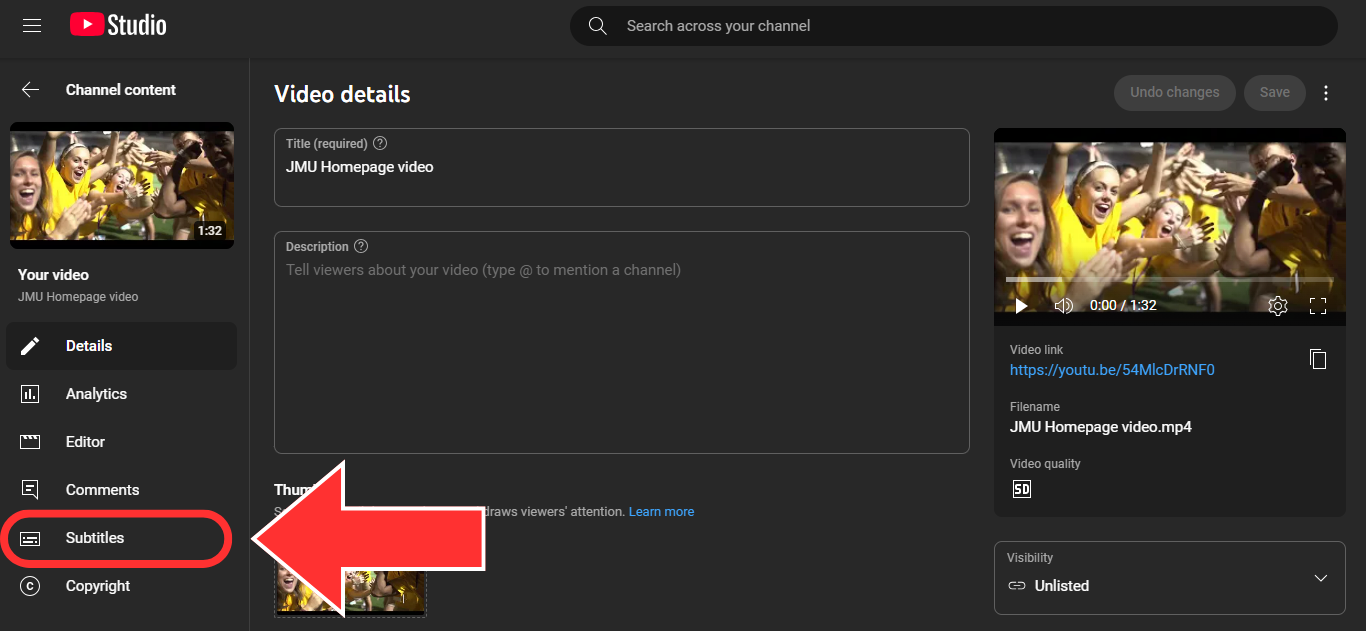
- On the "Video details" page, click on the "Subtitles" button in the left-side column.
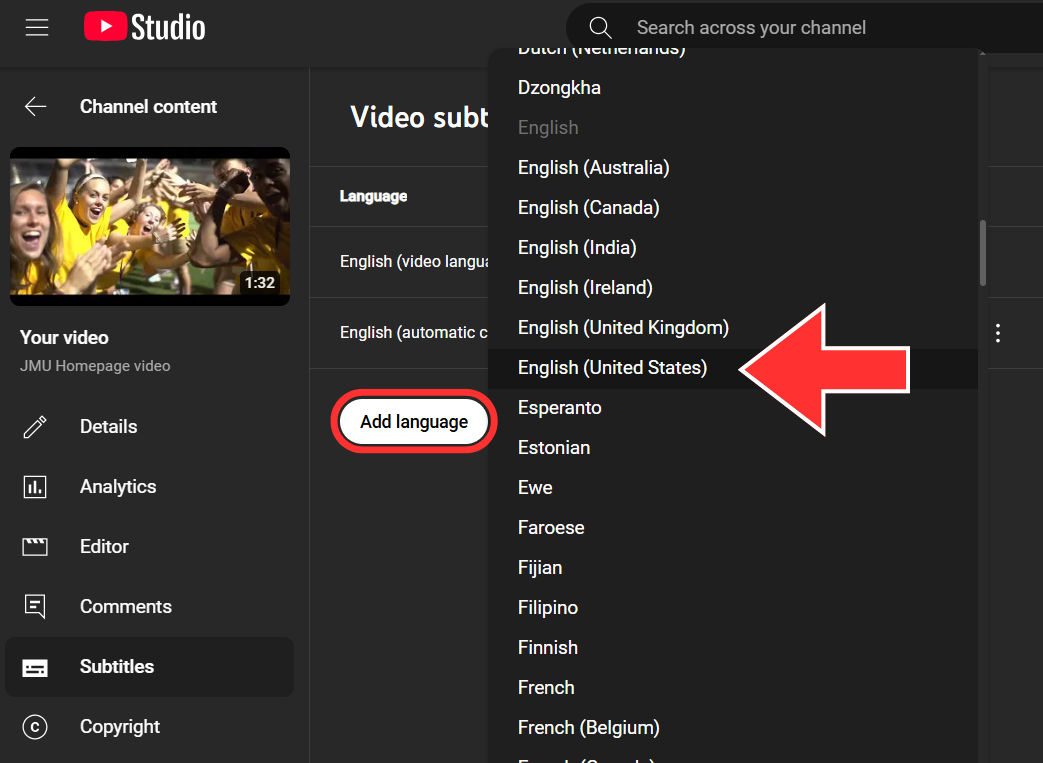
- Click the "Add Language" button and choose "English" or "English (United States)" from the pick list.
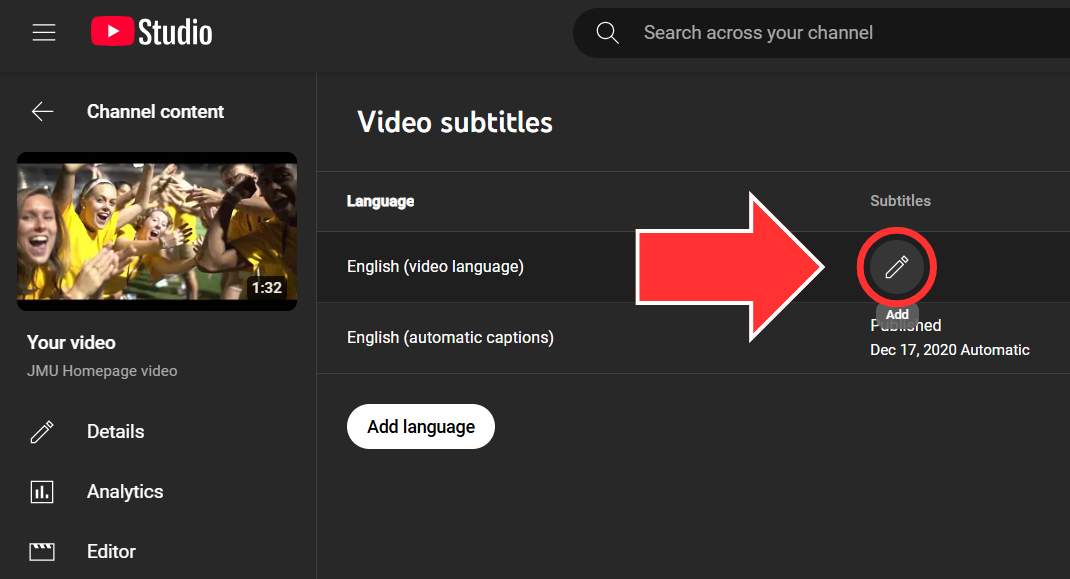
- The language you chose will show up in the table. From here click the "Add" button in the "Subtitles" column.
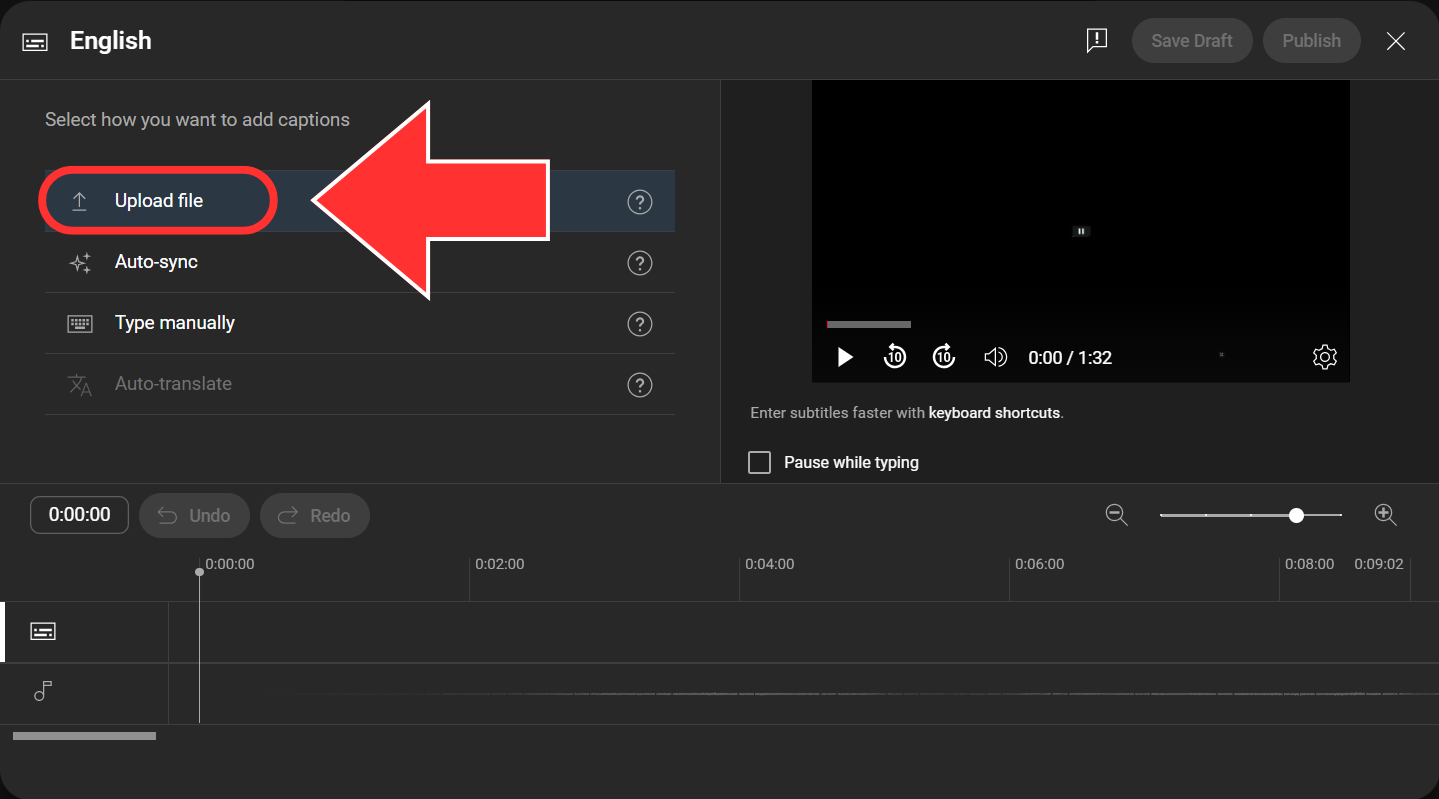
- The captioning interface will pop up on screen. Click the "Upload file" button.
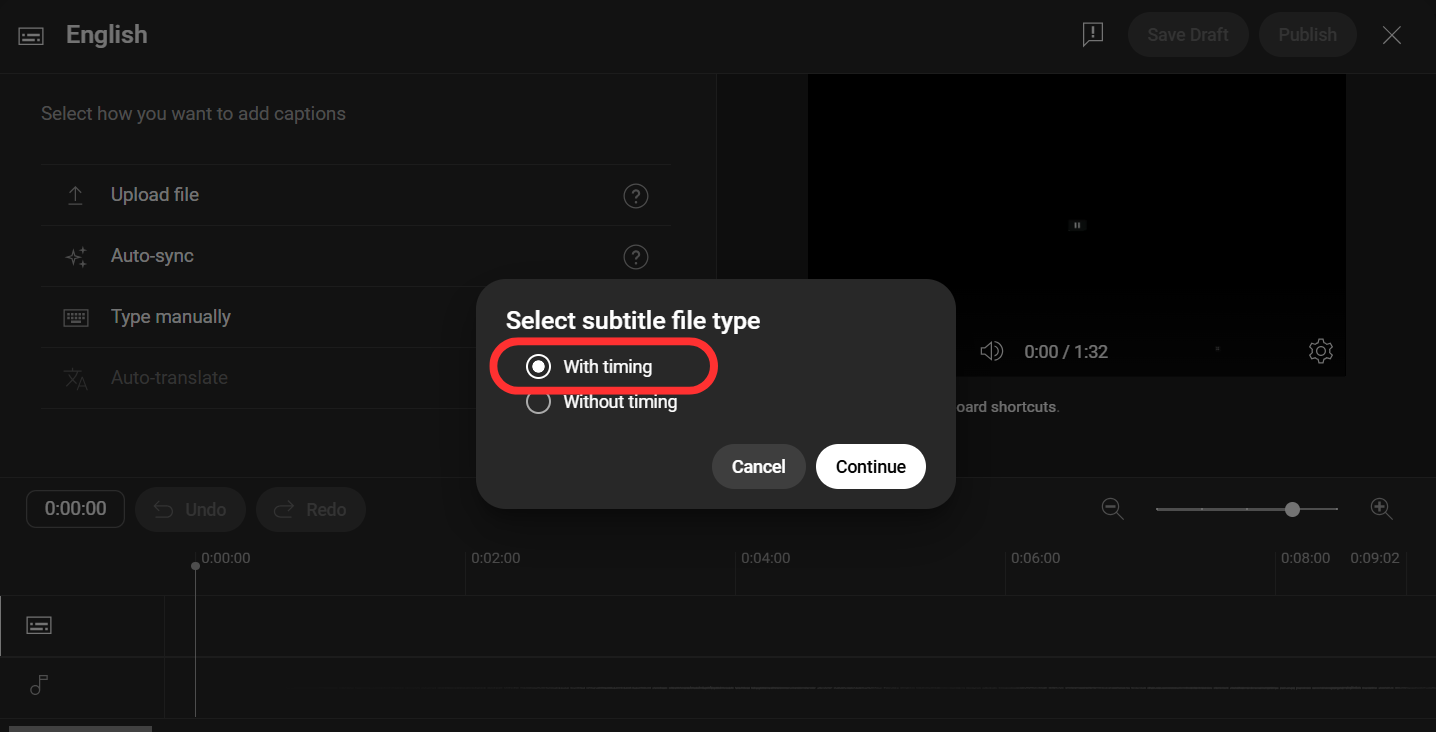
- Click the radio button next to "With timing" and then "Continue."
- Find and select the caption file that has been saved to your computer
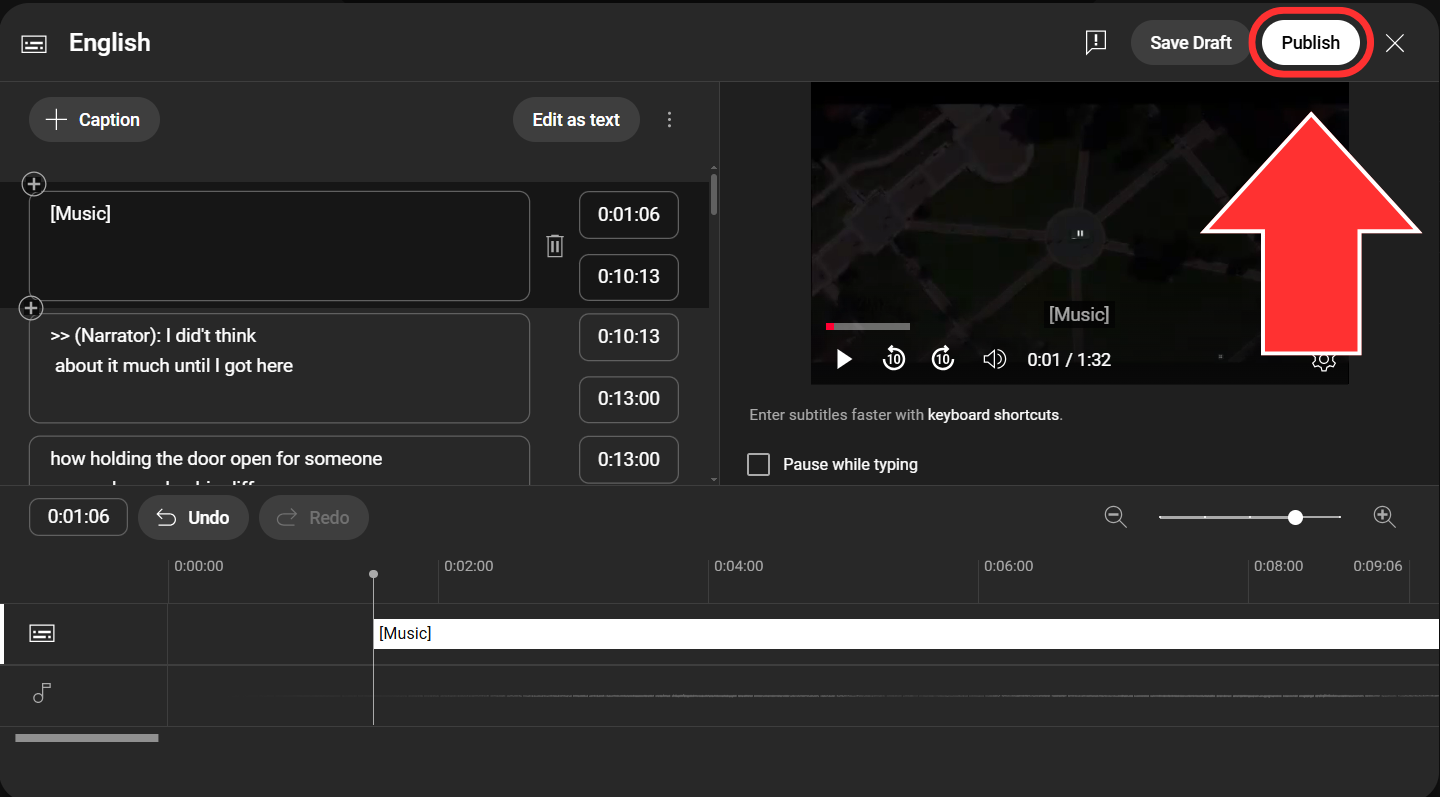
- If you received your caption file from a vendor, we recommend quality checking a few minutes of the uploaded captions to make sure that they are accurate, consistent, and contain no errors.
- Once you have uploaded and edited the captions to your liking, click the "Publish" button in the upper right of the interface.
You are now ready to share your captioned YouTube video!
Office of Disability Services