
- Install WinSCP
- Creating Session Profiles
- Connecting
- The Main Window
- Changing Directories
- Retrieving Files or Folders
- Sending Files or Folders
- Exiting WinSCP
Install WinSCP
Download WinSCP (Choose Installation package under the Downloads section) and install it.
Create a session profile
Open WinSCP by double-clicking on its icon or pulling it up from the Windows Button. The WinSCP Login dialog box will appear. Similar to a bookmark on a web browser, a session profile acts as a shortcut to a system account that you have previously accessed. Profiles can remember your user name (e-ID), password, and the system you wish to access.
Creating the profile
Note: This step only needs to be done once for each profile (each site). If you do not wish to save the session, you will have to reenter the information each time you open WinSCP. You should only save a session if you are the only user of your computer.
- Enter the FTPS location (such as www.jmu.edu or secureweb.jmu.edu) in the Host Name box.
- Selet File Protocol SFTP
- Enter 22 for the Port number.
- Enter your JMU e-ID in the User name box.
- While you can enter your password in the Password box, it is recommended that you not enter it. You will be prompted for the password. (Your system password is your JMU e-ID password.)

EXTRA NOTES:
Both secureweb.jmu.edu: and educ.jmu.edu will use the same settings.
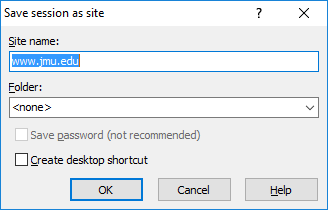
- Click the Save... button and in the box that appears, give the session a name and click OK as shown below.
Establishing a Connection
Once a session profile has been created and saved, you only have to open a connection and access that profile session. Remember that a saved session contains all the information needed to access a remote system. If you have not saved a session in the past, you must complete all the initial steps to access a remote system (see Starting WinSCP).
- Open WinSCP
- From the WinSCP Login dialog box, select the session you wish to enter
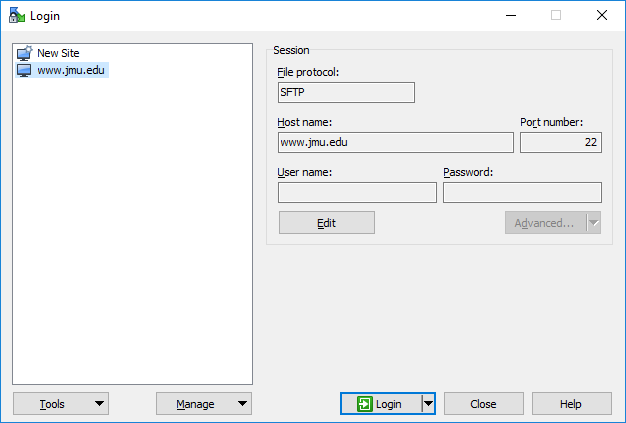
- Click Login
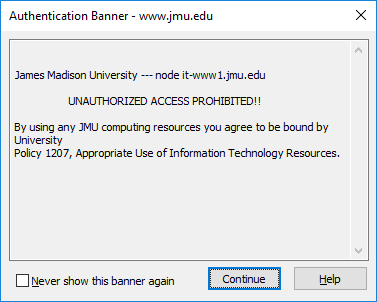
- You may see a authentication banner dialog box like this:
- If your password has not been saved, you will see a box like the one below where you will enter your password and click OK
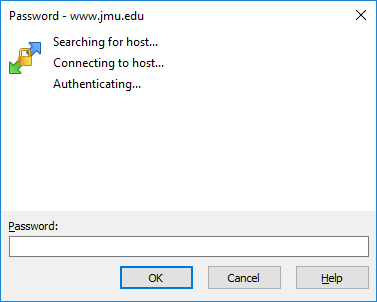
You will now be connected to the remote system you selected.
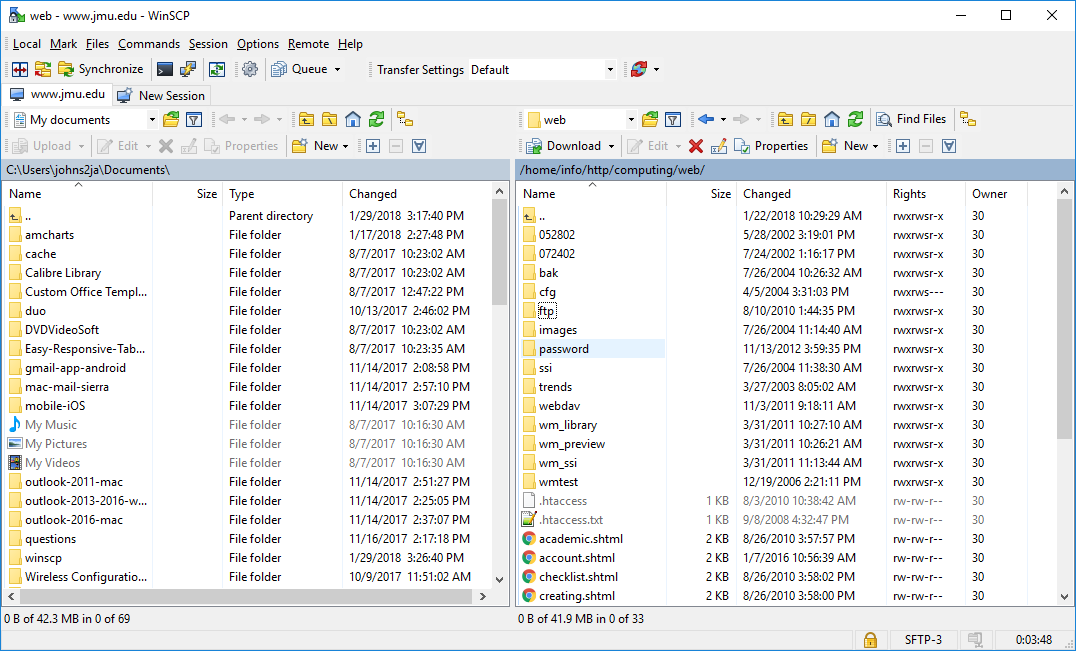
The Main Window
There are two sides to the main window, the local system (on the left) and the remote system (on the right).
Changing Directories
Changing directories on either your local drive (left side of the window) or the remote system (right side):
In the directory boxes, double-click the name of the directory or drive you would like to enter. Clicking on the double-dots (..) will take you up a directory level.
Retrieving a file or folder from the remote system
When you retrieve a file or folder from a remote system, you move it from that system to a file on your local directory.
- To retrieve a file from the remote system
- Highlight the filename or folder in the remote system file box.
- Choose the directory on your local system (your PC) in which you'd like to place the file you are retrieving.
- Drag the folder or file to the local destination. NOTE: You can also drag from an Explorer window to the destination.
Sending a file or folder to a remote system
This procedure is much like you did to retrieve a file, but the file will move in the opposite direction.
- Highlight the filename or folder in the local system file box.
- Choose the directory on the remote system in which you'd like to place the file.
- Drag the folder or file to the remote destination. NOTE: You can also drag from an Explorer window to the destination.
Exiting FTP or Closing a session
To exit WinSCP, select Session from the menu and choose Disconnect.
You will return to the WinSCP Login Screen where you can either create a new session or open a session profile or click Close to close the application.