
Enabling automatic captions for live Zoom meetings is a two-part process. You will only need to complete the first part once for each account. The second part will need to be completed for each meeting.
Please note: Automatic live captioning should only be used as a Universal Design best practice and is not an adequate solution for students with live captioning accommodations. If a student uses live captioning accommodations, ODS will be in contact as appropriate.
Part 1: Enable Live Automatic Transcription in Zoom Portal Settings
You will only need to do this part once per account.
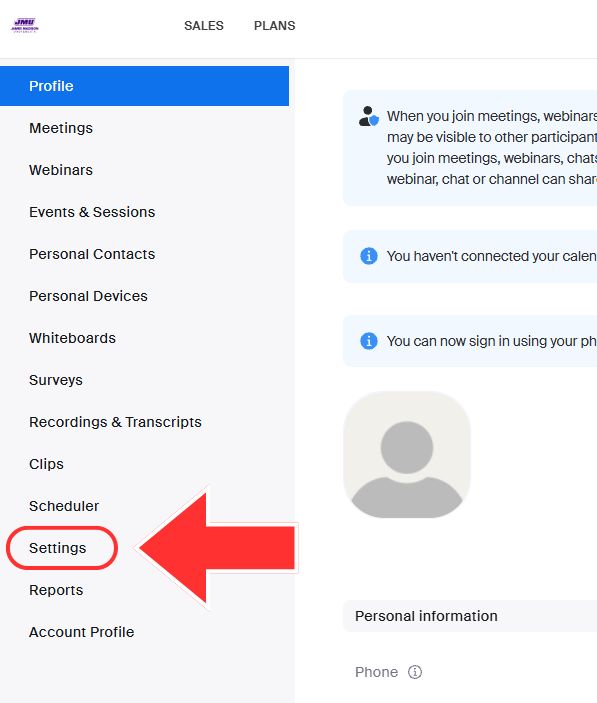
- Log in to the JMU Zoom website.
- Click Settings in the left navigation.
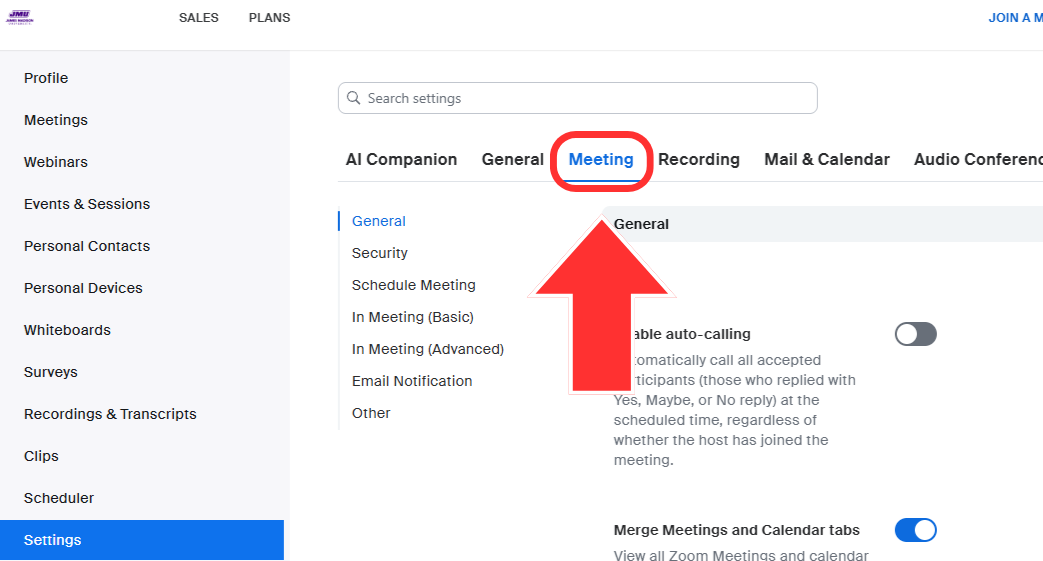
- Click the Meeting tab in the navigation ribbon.
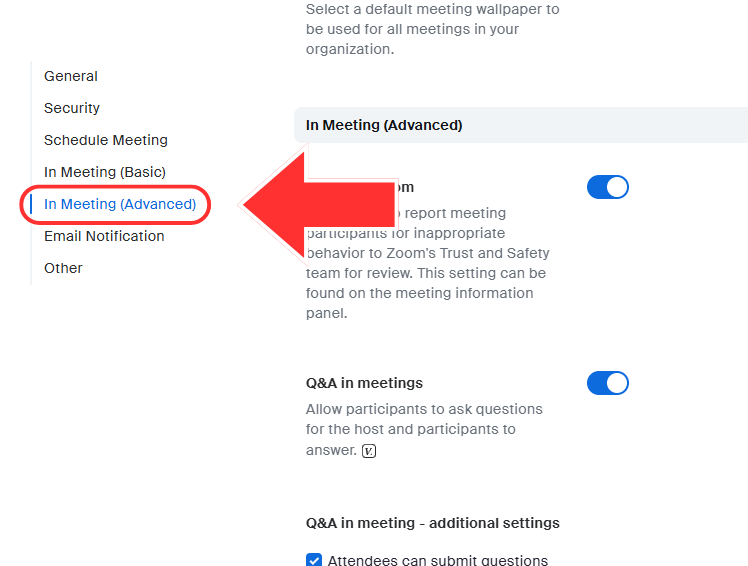
- Click In Meeting (Advanced) in the secondary navigation or scroll down to that section of the settings.
- For Automated captions, click the slider to turn on.
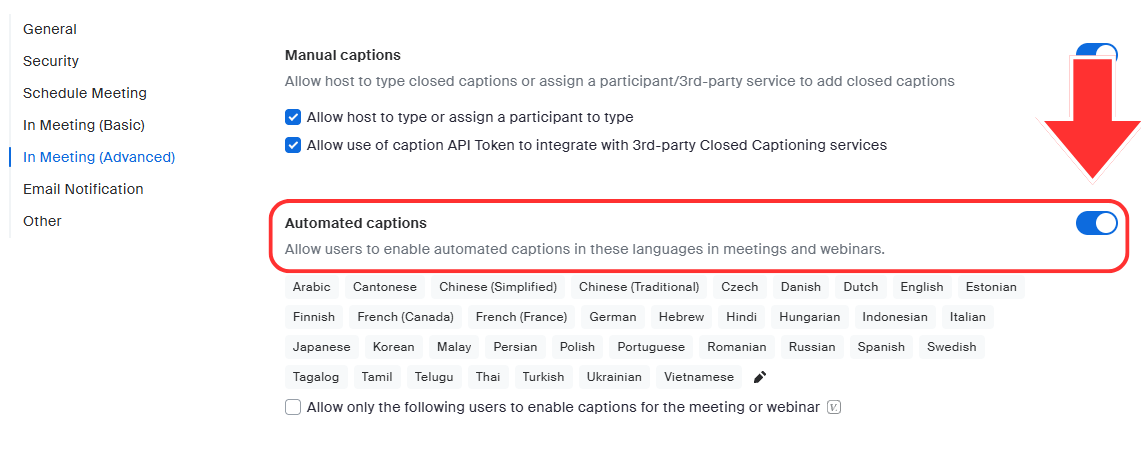
- Additional recommended settings to enable:
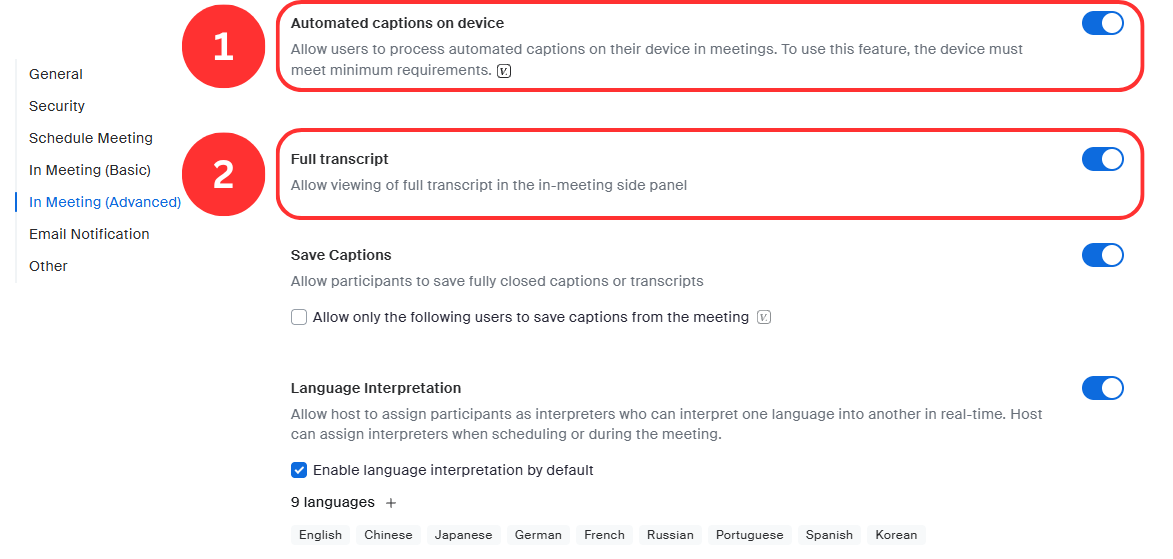
- Automated captions on device
- Full transcript
Part 2: Enable Captions During Meeting
You will need to do this part for every meeting.
- Navigate to the control bar.
- Click the Show captions button.

- If you do not see the Show captions button, click the [1] More button and then [2] Captions. It will now appear in your control bar.

- If you do not see the Show captions button, click the [1] More button and then [2] Captions. It will now appear in your control bar.
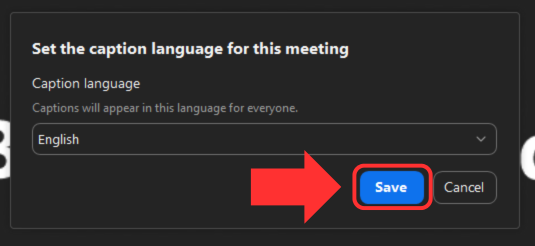
- In the language selection pop-up, select the caption language (it defaults to English) and click Save.
- Captions are now enabled for the meeting and any viewer can turn them on or off for themselves.