Sometimes you may wish to have a student schedule with you who is not your assigned advisee (ie. a student who is exploring changing their major). For those situations, you will need to create a appointment invitation URL. These URLs are specific to the Work Type (duration of meeting), channel, and advisor. By clicking the invitation URL, a student will bypass the first several steps that an advisee would go through in MyMadison Connect (selecting the advisor and duration, for instance), and will go straight to picking available times. This URL can be shared with any current student, and is not limited to assigned advisees.
*You can also create appointment invitations for those without JMU credentials to schedule appointments with you. When setting up the appointment invitation you will select Guest Access. These users will provide information about who they are and the purpose of their meeting when they schedule. If you want to offer an Appointment Scheduling URL to both JMU credentialed students and guests, you will need two separate URLs.
To create a URL that matches your availability:
- Click Create Appointment Invitation from your Service Resource page.

- Click Create Appointment Invitation from your Service Resource page.
- Choose Guest Access or JMU access.
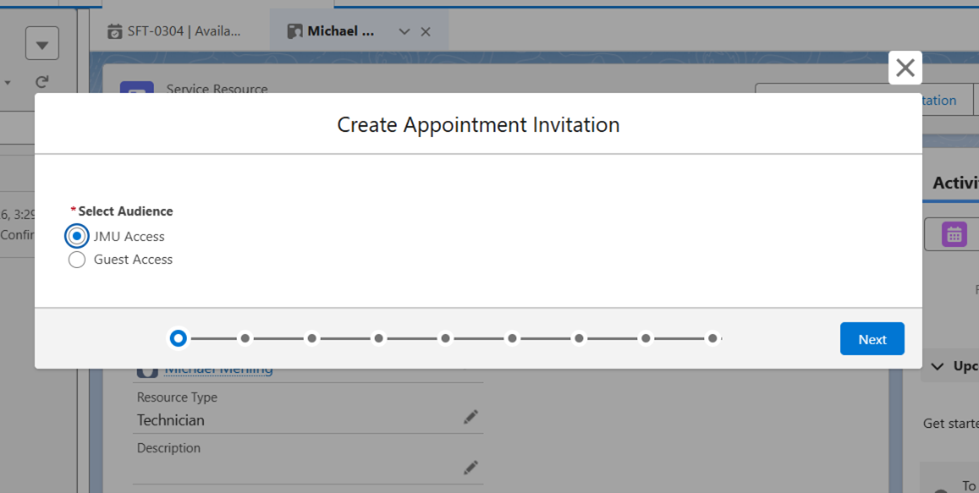
Guest access: is for inactive students or anyone who does not have JMU credentials.
- Select an Invite form
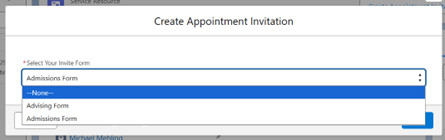
The Advising form will ask the meeting attendee to identify themselves with a question and a follow-up form which asks for their name and email address.
The Admissions form will do the same AND also ask for the meeting attendee’s current school
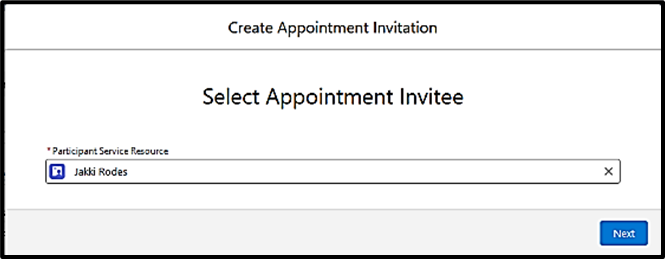
- Your name will appear in the Participant Service Resource field. Click Next.
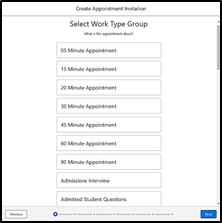
- Select the Work Type Group. Note: this Work Type Group must match an existing availability. Click Next.
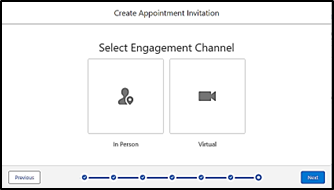
- Select Engagement Channel, either In person or Virtual.
- The Appointment Booking Start Date can remain unchanged (the current date defaults). The Appointment Booking End Date and Invitation URL Expiration Date should be left blank. By leaving those blank, you can use this appointment invitation URL again each time you set up new availability for the work type group you chose.
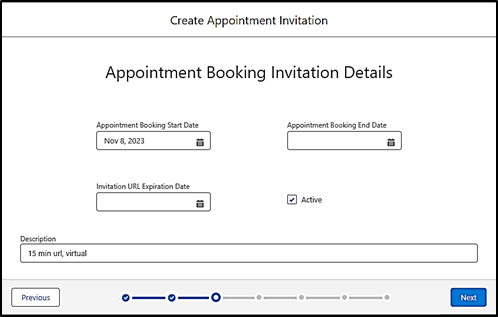
- Enter a brief Description. This will help distinguish this URL from other URLs you set up. Click Next.
- Your appointment times appear. Click Next.
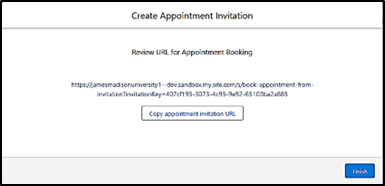
- Your URL has been created. You can copy it, make a hyperlink in your email, or distribute it in other ways. Anytime a student clicks this URL, they will be taken to a screen where they can select a time slot and their appointment with you will be scheduled. You can now click Finish.
Invitations URLS are limited to one channel type (i.e. in person or virtual). If you need to provide both options - in person and virtual - you will need create a separate URL for each.
What if I lose my appointment invitation URL?
You may want to record your appointment invitation URL so that you can easily attach it to an email or Teams message.
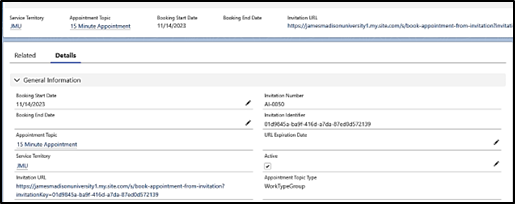
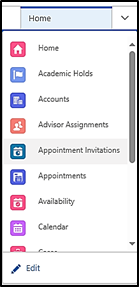
- If you happen to lose track of your appointment URL, you can navigate back to your Appointment Invitations in the Navigation drop down.
- Select the Appointment Invitation record you created.
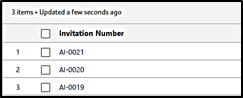
- Once you click the record, you will see the details behind the record. You can copy the URL from here or you can also delete the URL.