Access the Approval Page to View Declaration Approval Dashboard
- Log in to MyMadison (mymadison.jmu.edu).
- Click the My Approvals tab.
- Select Major/Minor Change Request under the Student Administration (SA) heading.

View Student Information
- To see detailed information about a particular student, click the Student Name.
- Student information includes current program, requested program, history of changes, academic level, access to the student's transcript, among others.
- Click Return when done.

View More Student Information
In order to process the request, you will need to scroll across several columns on the page. As you scroll, the first two columns will freeze to allow you to track which student the information pertains to.
- Click the left or right arrow in the top-right corner of the viewing window to scroll through the various columns of student information.

Change or Add a Concentration
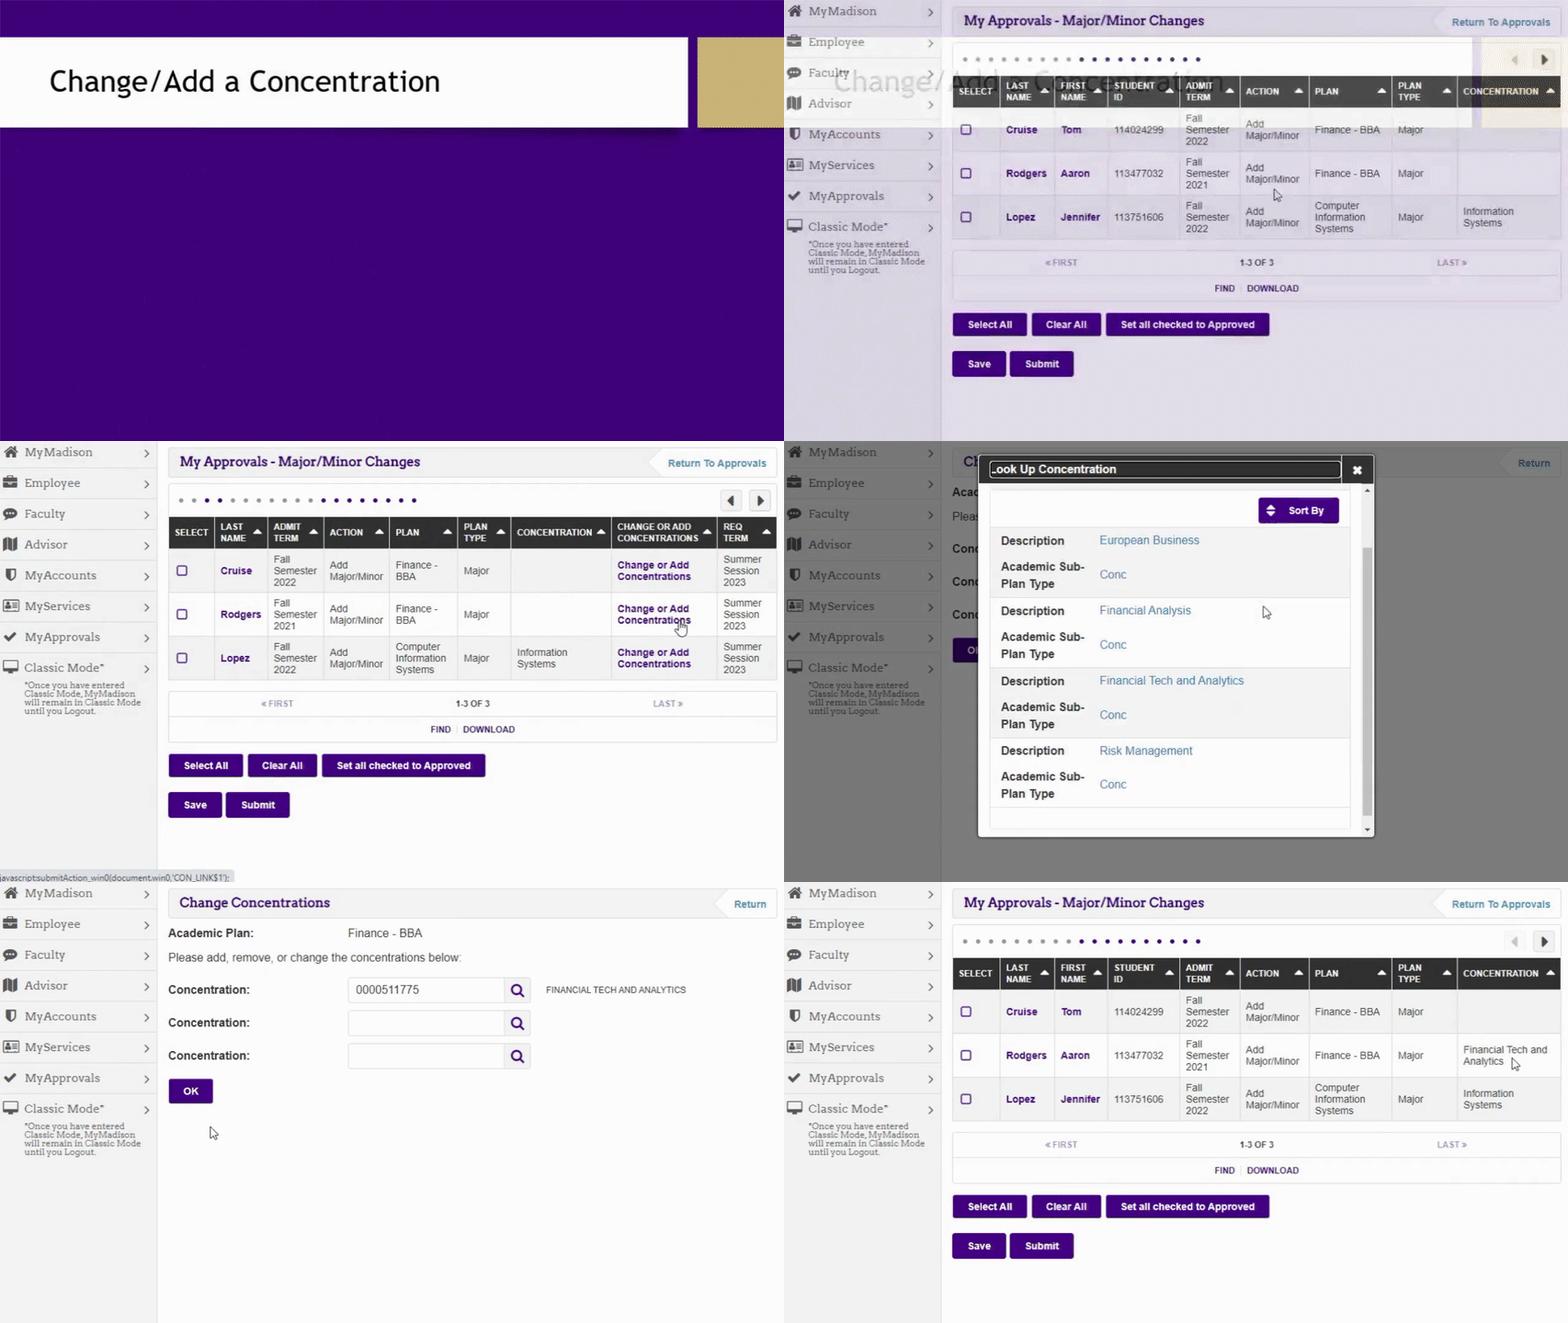
The approver has the ability to correct a student's request by adding, dropping, or replacing the student's concentration.
- Click Change or Add Concentrations in the student's corresponding row.
- Click the magnifying glass next to concentration.
- Select the desired concentration.
- Click OK.
Confirm the Requirement Term
The term selected drives the academic requirements report for the plan that is being approved. It will not affect the student's general education requirements. Terms can be selected for the past or the future.
- Click Change Requirement Term in the student's corresponding row.
- Select the desired requirement term.

Change or Add Advisors
An advisor should be added to each declaration unless the student is a Freshman and the Freshman advisor migration, which usually occurs in February, has not happened yet. You will be able to view the advisee count, and names that appear multiple times indicate the advisor advises multiple areas.
- Click Change or Add Advisors in the student's corresponding row.
- Click the magnifying glass next to Advisor 1.
- Enter search criteria to locate the appropriate advisor.
- Select the Name and Description that best fits the student's declaration.
- Repeat as necessary for additional advisors.
- Click OK.

Add Comments for Students
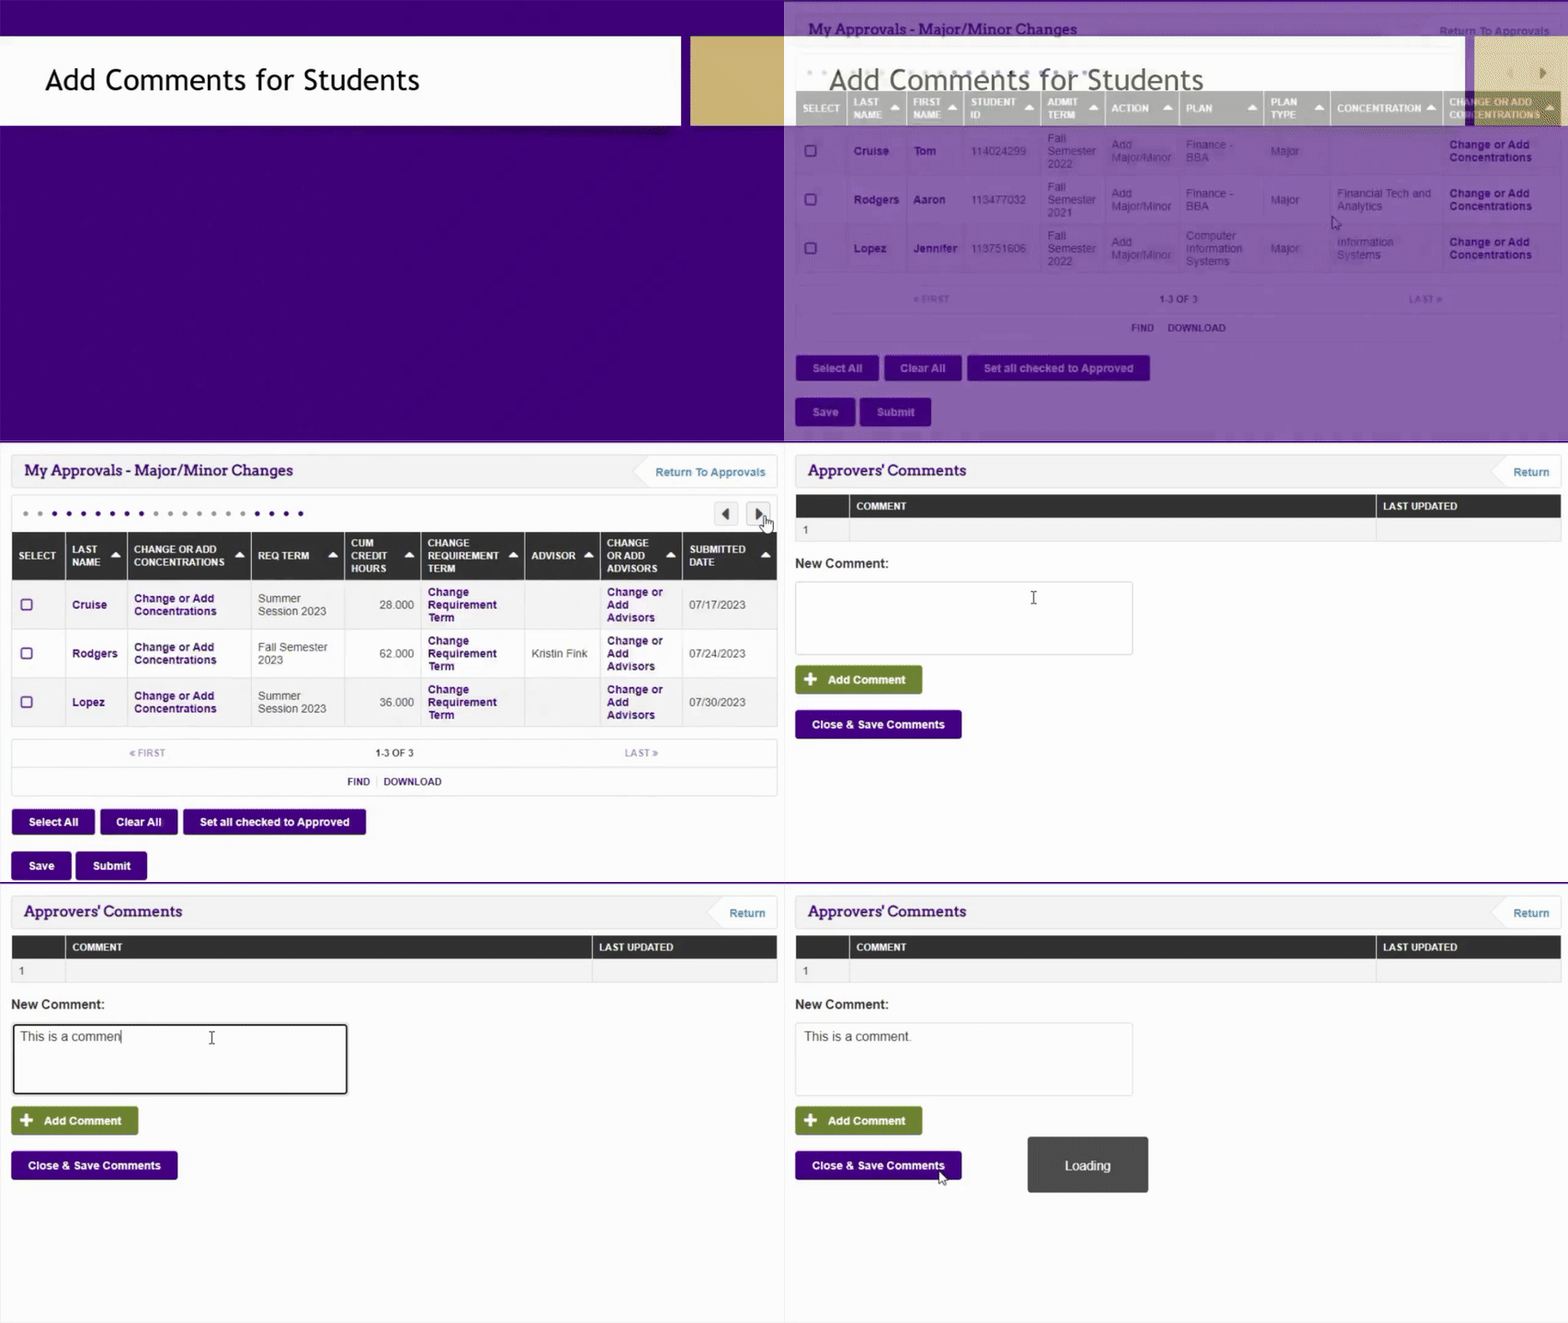
Comments are used as a communication tool with the student. The student will receive an email when they have a comment to view. Students will only receive comments when the request is pending, but when the request is approved or denied, the student will no longer see any comments.
- Click Add Comments in the student's corresponding row.
- Enter a comment.
- Click Close and Save Comments.
Take Ownership of the Request
Approvers can take ownership of a request if they are currently working with the student. This will help when there are several approvers for one program.
- Click the Take? check box in the student's corresponding row.

Finalize Approval
You have the option to approve or deny the request.
- In the student's corresponding row, select the appropriate decision in the Approve/Deny dropdown menu.
- Click Submit or Save.
- Clicking Submit will complete the student's approval or denial.
- Clicking Save will maintain any changes made without submitting the student's decision.
